

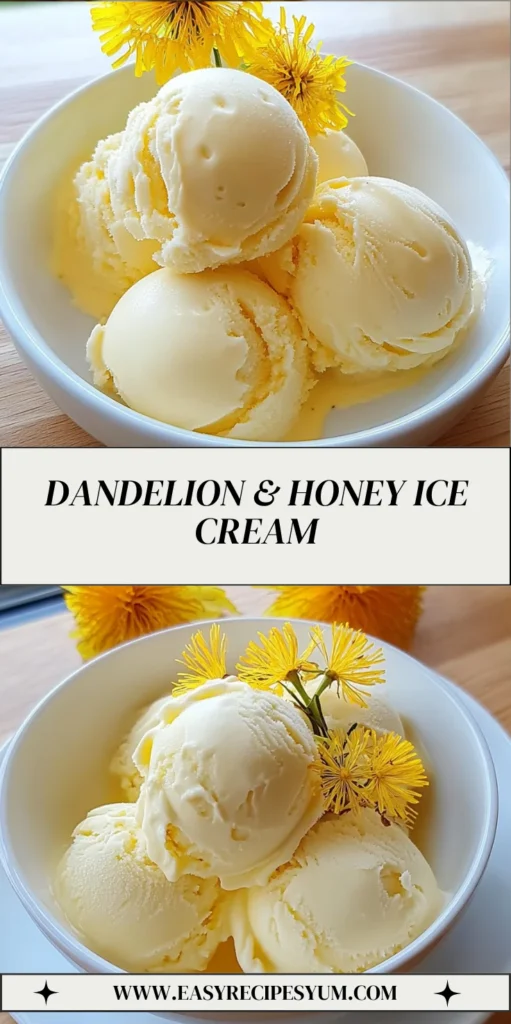
Introduction to Dandelion & Honey Ice Cream
Spring is a magical time, isn’t it? The world awakens, flowers bloom, and the air is filled with sweet scents. One of my favorite ways to celebrate this season is by making Dandelion & Honey Ice Cream. This delightful treat captures the essence of spring in every creamy bite. It’s not just a dessert; it’s a quick solution for busy days or a charming dish to impress your loved ones. Plus, it’s a wonderful way to use those vibrant dandelion petals that pop up in our gardens. Let’s dive into this sweet adventure together!
Why You’ll Love This Dandelion & Honey Ice Cream
This Dandelion & Honey Ice Cream is a delightful blend of simplicity and flavor. It’s easy to whip up, making it perfect for busy moms like us. The sweet, floral notes of dandelion paired with the rich honey create a taste that’s simply unforgettable. Plus, it’s a unique way to introduce your family to the wonders of spring. Trust me, every scoop feels like a warm hug on a sunny day!
Ingredients for Dandelion & Honey Ice Cream
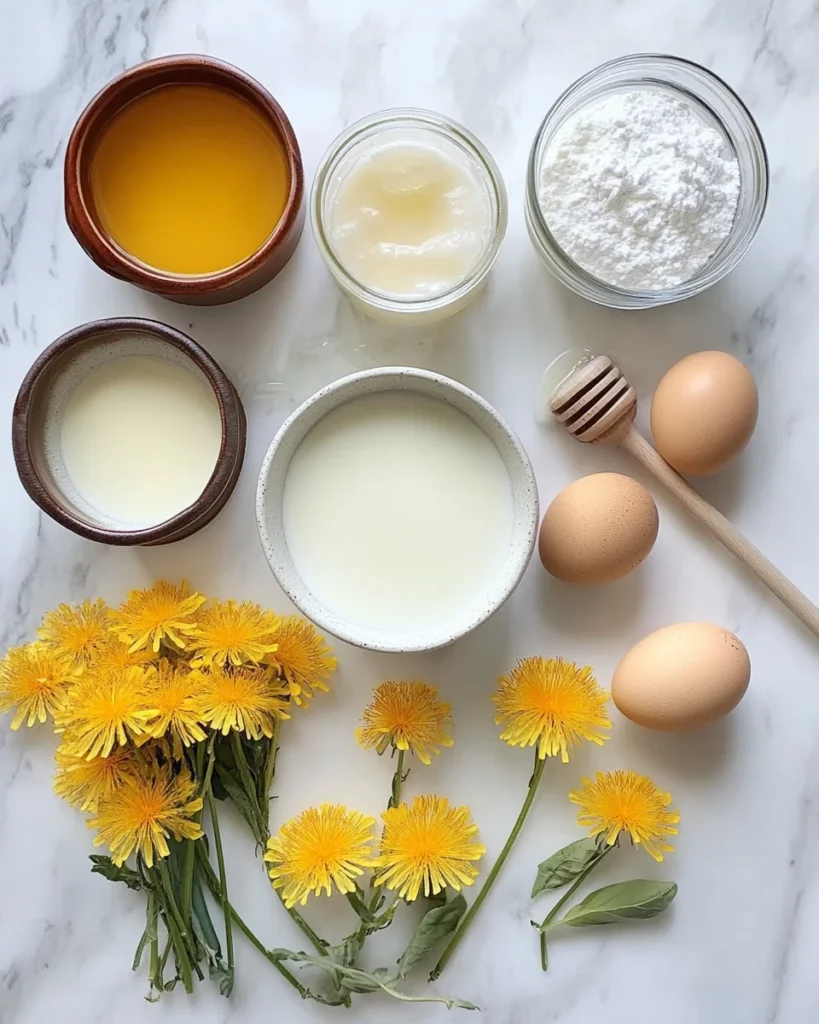
Gathering the right ingredients is the first step to creating this delightful Dandelion & Honey Ice Cream. Here’s what you’ll need:
- Dandelion petals: Fresh, pesticide-free petals are essential. Only use the yellow parts, as the green bits can be bitter. Harvest them from a clean area, and you’ll need about a cup.
- Whole milk: This adds creaminess to the ice cream. It’s the base for our floral infusion, so choose a good quality milk for the best flavor.
- Heavy cream: This is what gives the ice cream its rich, velvety texture. The more cream, the creamier the ice cream!
- Egg yolks: They help create a custard base, adding richness and a smooth mouthfeel. They’re the secret to that luxurious texture.
- Honey: Preferably wildflower or clover honey, this natural sweetener enhances the floral notes of the dandelions. It’s a healthier alternative to refined sugar.
- Granulated sugar: This is optional, depending on your sweetness preference. If you like it sweeter, feel free to add a bit more.
- Pure vanilla extract: A splash of vanilla rounds out the flavors beautifully, adding warmth to the ice cream.
- A pinch of salt: This enhances all the flavors, making them pop. It’s a small but mighty ingredient!
For exact measurements, check the bottom of the article where you can find everything available for printing. Happy gathering!
How to Make Dandelion & Honey Ice Cream
Now that we have our ingredients ready, let’s dive into the fun part—making Dandelion & Honey Ice Cream! Follow these simple steps, and you’ll be savoring this delightful treat in no time.
Step 1: Prepare the Dandelions
First things first, let’s gather those dandelion petals! Harvest them from a clean, pesticide-free area. Gently rinse the flowers under cool water and pat them dry with a clean towel. Carefully pull out the yellow petals, discarding any green bits. Trust me, those green parts can be quite bitter! You’ll need about a cup of loose petals for this recipe.
Step 2: Make the Infusion
Next, it’s time to create our floral infusion. In a small saucepan, warm the whole milk over low heat until it’s just steaming—don’t let it boil! Add the dandelion petals and give it a gentle stir. Cover the saucepan and let it steep for 30 to 60 minutes. The longer you steep, the more vibrant the flavor will be. After steeping, strain the mixture through a fine mesh sieve, discarding the petals. Set the infused milk aside; it’s going to be the star of our ice cream!
Step 3: Make the Custard Base
Now, let’s whip up the custard base! In a medium saucepan, whisk together the egg yolks, honey, and optional granulated sugar until the mixture is smooth and pale. Slowly whisk in the dandelion-infused milk and heavy cream. This combination is where the magic happens, creating a rich and creamy base for our ice cream.
Step 4: Cook the Custard
Place the saucepan over medium-low heat. Cook the mixture, stirring constantly with a wooden spoon or silicone spatula. You want to heat it until it thickens enough to coat the back of the spoon—this usually takes about 8 to 10 minutes. Be careful not to let it boil, or you might end up with scrambled eggs! Patience is key here.
Step 5: Finish and Chill
Once your custard has thickened, remove it from the heat. Stir in the pure vanilla extract and a pinch of salt to enhance the flavors. Pour the custard through a sieve into a clean bowl to catch any curdled bits. Let it cool to room temperature, then cover and chill in the fridge for at least 4 hours or overnight. Chilling is crucial for that perfect texture!
Step 6: Churn the Ice Cream
After your custard has chilled, it’s time to churn! Pour the mixture into your ice cream maker and churn according to the manufacturer’s instructions. This usually takes about 20 to 25 minutes. You’re looking for a soft-serve consistency—smooth and creamy, just like a warm spring day!
Step 7: Freeze to Firm Up
Once churned, transfer the ice cream to a lidded container. Pop it in the freezer for at least 2 to 3 hours to firm up. This step is essential for achieving that scoopable texture we all love. Trust me, the wait will be worth it!
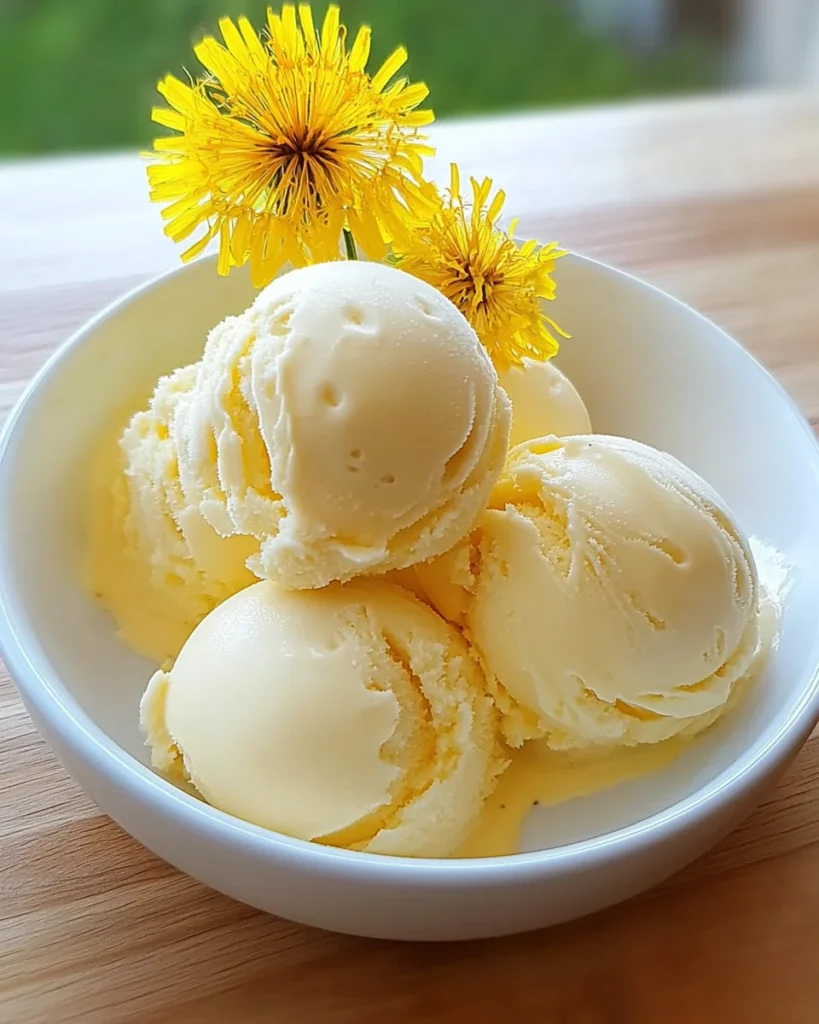
Step 8: Serve and Enjoy
Finally, it’s time to scoop and enjoy your Dandelion & Honey Ice Cream! Serve it in bowls or cones, and take a moment to appreciate that sweet, floral, sunshiney flavor. Each bite is like a little taste of spring, and I can’t wait for you to experience it!
Tips for Success
- Always use fresh, pesticide-free dandelion petals for the best flavor.
- Adjust the sweetness by tasting the custard before churning; add more honey or sugar if desired.
- For a creamier texture, churn the ice cream a bit longer, but don’t overdo it!
- Let the ice cream sit at room temperature for a few minutes before scooping for easier serving.
- Experiment with different honey varieties to find your favorite flavor profile.
Equipment Needed
- Ice cream maker: A traditional churner works great, but a no-churn method can also be used.
- Medium saucepan: Essential for cooking the custard base; a heavy-bottomed one is best.
- Fine mesh sieve: Perfect for straining the dandelion petals from the milk.
- Whisk: A good whisk is key for mixing the egg yolks and honey smoothly.
- Mixing bowls: Use these for combining ingredients and chilling the custard.
Variations
- Herbal Infusions: Try adding other edible flowers like lavender or chamomile for a unique twist on flavor.
- Dairy-Free Option: Substitute whole milk and heavy cream with coconut milk or almond milk for a dairy-free version.
- Flavor Enhancements: Add a splash of lemon juice or zest for a refreshing citrus note that complements the floral flavors.
- Sweetener Alternatives: Use maple syrup or agave nectar instead of honey for a different sweetness profile.
- Chocolate Swirl: Fold in some melted dark chocolate or chocolate chips after churning for a delightful chocolate-dandelion combo.
Serving Suggestions
- Pair your Dandelion & Honey Ice Cream with fresh berries for a burst of color and flavor.
- Serve it alongside a slice of lemon pound cake for a delightful dessert duo.
- Drizzle with extra honey or a sprinkle of edible flowers for a beautiful presentation.
- Enjoy with a refreshing herbal tea or a light sparkling drink to complement the floral notes.
FAQs about Dandelion & Honey Ice Cream
Can I use store-bought dandelion petals?
While you can find dandelion petals in some specialty stores, I recommend harvesting your own from a clean, pesticide-free area. This ensures freshness and flavor, making your Dandelion & Honey Ice Cream truly special!
What if I can’t find dandelion petals?
No worries! If dandelion petals are hard to come by, consider using other edible flowers like violets or nasturtiums. They’ll add a unique twist to your ice cream while still capturing that spring essence.
How long does the ice cream last in the freezer?
Your Dandelion & Honey Ice Cream can last up to two weeks in the freezer. Just make sure to store it in an airtight container to keep it fresh and creamy!
Can I make this ice cream without an ice cream maker?
Absolutely! If you don’t have an ice cream maker, pour the chilled custard into a shallow dish and freeze it. Stir every 30 minutes for about 2-3 hours until it reaches a creamy consistency.
Is this ice cream suitable for kids?
Yes! This Dandelion & Honey Ice Cream is a fun and unique treat for kids. The sweet, floral flavor is sure to delight their taste buds, and it’s a great way to introduce them to the wonders of nature!
Final Thoughts
Making Dandelion & Honey Ice Cream is more than just a recipe; it’s a celebration of spring’s beauty and bounty. Each scoop is a reminder of the simple joys in life, like gathering fresh ingredients and creating something special for loved ones. The sweet, floral flavor dances on your palate, evoking memories of sunny days and blooming gardens. I hope this delightful treat brings a smile to your face and warmth to your heart. So, gather those dandelion petals and let’s create a little magic in the kitchen together. You deserve this sweet moment of joy!
Print
Dandelion & honey ice cream: a sweet spring delight!
- Total Time: 4 hours 45 minutes
- Yield: Approximately 1 quart 1x
- Diet: Vegetarian
Description
A delightful ice cream made with dandelion petals and honey, capturing the essence of spring.
Ingredients
- 1 cup dandelion petals (fresh, pesticide-free – only yellow parts, no green bits)
- 1 cup whole milk
- 2 cups heavy cream
- 4 large egg yolks
- 1/2 cup honey (preferably wildflower or clover honey)
- 1/4 cup granulated sugar (optional, if you like it sweeter)
- 1 tsp pure vanilla extract
- A pinch of salt
Instructions
- Prepare the dandelions: Harvest dandelion flowers from a clean, pesticide-free area. Gently rinse and pat dry. Pull out the yellow petals, discarding all green parts (they’re bitter). You’ll need about 1 cup of loose petals.
- Make the infusion: In a small saucepan, warm the milk over low heat until just steaming (don’t boil). Add the dandelion petals and stir. Cover and let steep for 30–60 minutes. The longer you steep, the more floral the flavor. After steeping, strain through a fine mesh sieve and discard the petals. Set infused milk aside.
- Make the custard base: In a medium saucepan, whisk together the egg yolks, honey, and optional sugar until smooth and pale. Slowly whisk in the dandelion-infused milk and heavy cream.
- Cook the custard: Place the saucepan over medium-low heat. Cook the mixture, stirring constantly with a wooden spoon or silicone spatula, until it thickens enough to coat the back of the spoon (about 8–10 minutes). Don’t let it boil or the eggs might scramble!
- Finish and chill: Remove from heat. Stir in the vanilla extract and a pinch of salt. Pour the custard through a sieve into a clean bowl to catch any curdled bits. Let it cool to room temperature, then cover and chill in the fridge for at least 4 hours or overnight.
- Churn the ice cream: Once chilled, pour the mixture into your ice cream maker and churn according to the manufacturer’s instructions (usually 20–25 minutes), until it reaches soft-serve consistency.
- Freeze to firm up: Transfer the churned ice cream to a lidded container. Freeze for at least 2–3 hours to firm up before scooping.
- Serve and enjoy: Scoop into bowls or cones, and enjoy that sweet, floral, sunshiney flavor. It’s like springtime in a spoon!
Notes
- Ensure dandelion petals are harvested from a pesticide-free area.
- Adjust the sweetness by adding more or less sugar according to your taste.
- For a creamier texture, churn the ice cream longer.
- Prep Time: 30 minutes
- Cook Time: 15 minutes
- Category: Dessert
- Method: Churning
- Cuisine: American
Nutrition
- Serving Size: 1/2 cup
- Calories: 250
- Sugar: 20g
- Sodium: 50mg
- Fat: 15g
- Saturated Fat: 9g
- Unsaturated Fat: 4g
- Trans Fat: 0g
- Carbohydrates: 30g
- Fiber: 0g
- Protein: 3g
- Cholesterol: 100mg
Keywords: dandelion, honey, ice cream, spring dessert