
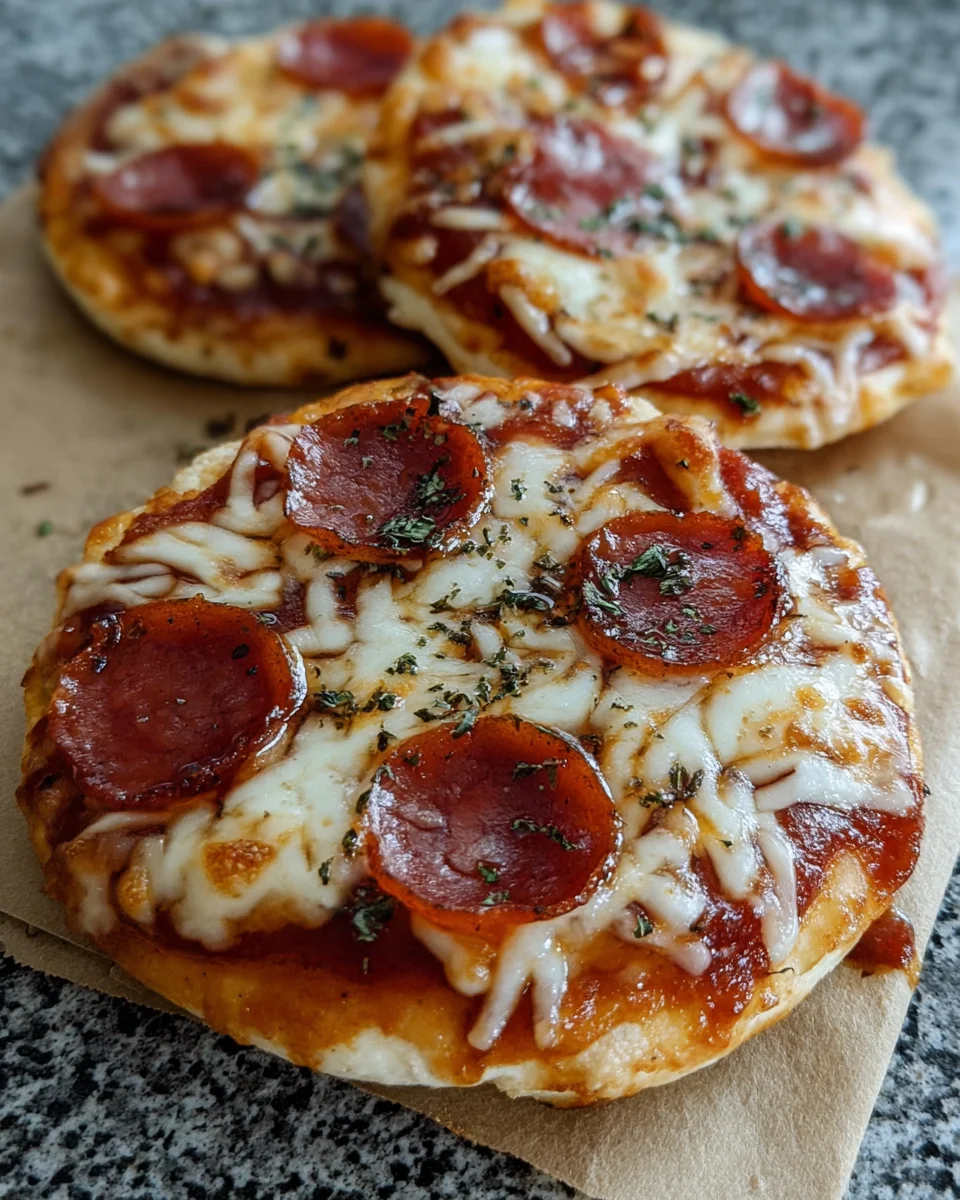
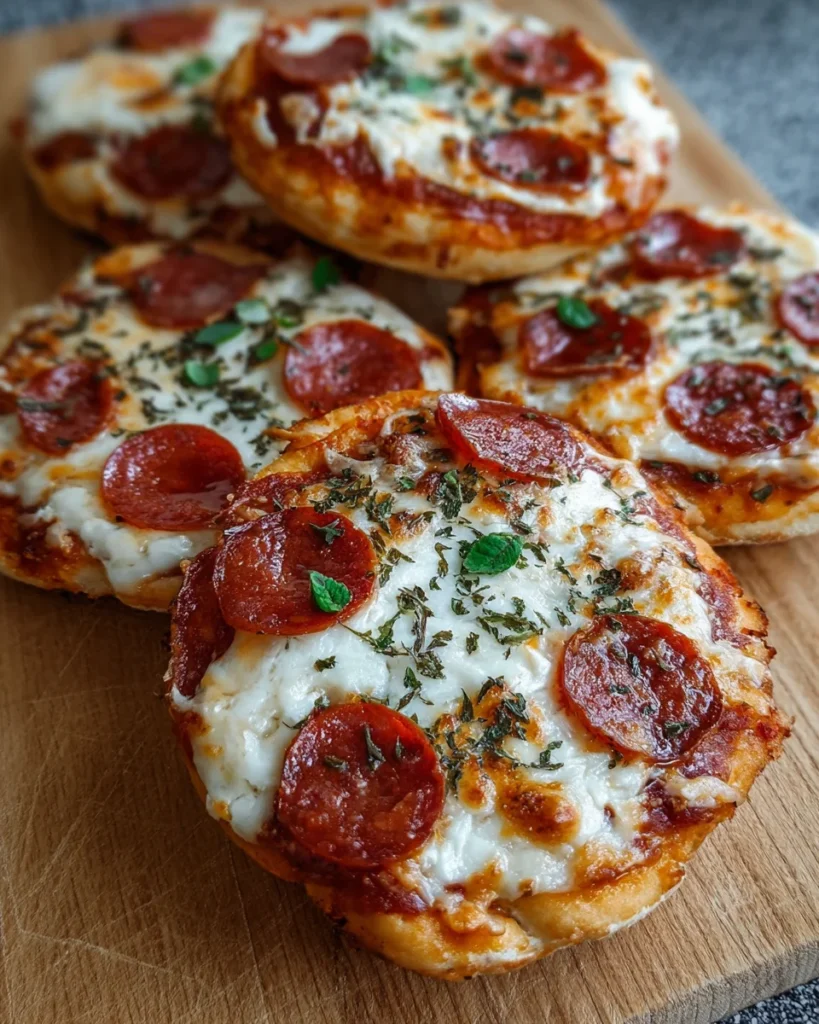
Introduction to Mini Lunchbox Pizzas
Hey there, fellow busy moms and professionals! If you’re anything like me, finding quick and delightful meals for your kids can sometimes feel like chasing after a tornado. That’s where these Mini Lunchbox Pizzas come in! They’re not only fun to make, but also a surefire way to bring a smile to your little ones’ faces. Perfect for lunchboxes or after-school snacks, these pizzas are a simple solution that makes busy days just a bit brighter. Trust me, once you try them, you’ll find yourself making these little delights time and time again!
Why You’ll Love This Mini Lunchbox Pizzas
These Mini Lunchbox Pizzas are a lifesaver for busy parents like us! They come together in no time, making them an incredible choice when you’re juggling work, homework, and the never-ending dinner prep. Not only are they quick to whip up, but they also allow for creativity with toppings. Your kids can personalize their pizzas, turning lunchtime into a fun, delicious experience that they’ll look forward to every day.
Ingredients for Mini Lunchbox Pizzas
Gathering the right ingredients is half the fun! Below are the components you’ll need to create these delicious Mini Lunchbox Pizzas.
- Self-raising flour: This magical ingredient gives your pizzas that perfect fluffiness without the need for yeast. You can substitute it with all-purpose flour by adding a bit of baking powder if you’re in a pinch.
- Full-fat plain Greek yogurt: This adds moisture and richness to the dough. If you’re looking for a lighter option, low-fat yogurt works great too!
- Tomato paste: Concentrated and flavorful, it’s the perfect base for your sauce. Feel free to use homemade tomato sauce or even your favorite store-bought variety for convenience.
- Freshly shredded mozzarella: This cheese melts beautifully and gives that classic pizza flavor. Go ahead and try other favorites like cheddar or pepper jack for a zesty twist.
- Pepperoni: A timeless topping that kids absolutely adore! If you’re looking for healthier alternatives, try diced veggies or turkey pepperoni instead.
Want to see the specific amounts? Check out the end of the article for precise measurements available for printing!
How to Make Mini Lunchbox Pizzas
Step 1: Preheat Your Oven
Let’s kick things off right by preheating your oven! Set it to 200°C (400°F) or 180°C (350°F) for those using a fan-forced setting. Preheating is crucial as it ensures your Mini Lunchbox Pizzas cook evenly and become perfectly golden. It’s like giving your oven a warm-up, preparing it to create crispy edges and gooey cheese that everyone will love!
Step 2: Prepare the Dough
Next up, it’s time to bring your dough to life! In a large mixing bowl, combine the self-raising flour and Greek yogurt thoroughly. Start by mixing with a spoon until you see large flakes form. Then, ditch the spoon and knead with your hands for about 1–2 minutes until you have a soft, pliable dough. It should be smooth and just a touch sticky. If it’s too gooey, sprinkle a bit more flour. This dough is the base of your Mini Lunchbox Pizzas and is simply delightful!
Step 3: Roll Out the Dough
Now, let’s roll! Dust a clean surface with a little flour to keep things easy. Take your dough and gently roll it out to about 1 cm (½ inch) thick. If you’re using a rolling pin, make sure to apply even pressure. Once it’s rolled out evenly, grab a large mug or cookie cutter and cut out rounds. This step can be a fun activity for the kids too!
Step 4: Add the Sauce
It’s sauce time! Spread a small amount of tomato paste evenly over each dough round. Remember, less is more—too much sauce can lead to soggy pizzas. Aim for just enough to cover the surface without overdoing it. A thin layer will enhance the flavor without overwhelming your Mini Lunchbox Pizzas!
Step 5: Top Your Pizzas
Here comes the best part—topping your pizzas! Generously sprinkle shredded mozzarella over each one and add the pepperoni, or your choice of toppings. Make sure to distribute the toppings evenly for a balanced bite every time. The kids will love crafting their unique creations!
Step 6: Baking Time
It’s time to bake your creations! Pop the baking tray in the oven for 12–14 minutes. Keep an eye on them, and look for that golden-brown color and melted cheese. When they’re done, carefully remove the tray using oven mitts—safety first, no one wants to get burned by hot surfaces. Let the aroma waft through your kitchen; it’s going to be amazing!
Step 7: Cooling and Serving
Once baked, let your Mini Lunchbox Pizzas cool on the tray for a few minutes. This is important because it helps to ensure the cheese sets a bit, making them easier to handle. Plus, that little wait enhances the flavors. Then, they’re ready to be devoured or stored for lunchboxes!
Tips for Success
- Measure flour accurately; too much can make the dough tough.
- For even baking, try to cut your dough rounds in uniform sizes.
- Experiment with different toppings to keep things exciting.
- Make a double batch and freeze extras for busy days.
- Let the kids help with topping and cutting; it’s a fun activity!
Equipment Needed
- Baking tray: A standard baking sheet works perfectly, but a pizza stone can give you a crispier crust.
- Parchment paper: Essential for easy cleanup and to prevent sticking. Aluminum foil can be used in a pinch.
- Mixing bowl: Any large bowl will do, even a deep dish works great.
- Rolling pin: If you don’t have one, a clean bottle or can works just as well!
- Cookie cutter or mug: Any round object can serve as a cutter—just be creative!
Variations
- Swap pepperoni for sliced veggies like bell peppers, mushrooms, or olives for a healthier option.
- Use whole wheat self-raising flour for a nutritious twist.
- Try different cheese blends, like feta or gorgonzola, for a gourmet touch.
- Experiment with barbecue sauce instead of tomato paste for a smoky flavor.
- Add fresh herbs like basil or oregano to the dough for an aromatic boost.
Serving Suggestions
- Pair Mini Lunchbox Pizzas with a side of crunchy carrot sticks or cucumber slices for a fresh bite.
- Serve with a small bowl of marinara sauce for dipping; kids love this extra touch!
- A glass of milk or a fruit smoothie complements the meal perfectly.
- For a fun presentation, arrange pizzas on a colorful plate or platter to brighten up lunchtime.
FAQs about Mini Lunchbox Pizzas
Let’s tackle some common questions you might have about these delightful Mini Lunchbox Pizzas!
Can I make these pizzas ahead of time?
Absolutely! You can prepare the dough and toppings ahead, assembling them when you’re ready to bake. They store well in the fridge!
How do I keep Mini Lunchbox Pizzas warm?
If you’re packing them in lunchboxes, a thermos or insulated container keeps them warm until lunchtime.
What toppings can I use for picky eaters?
Stick to familiar flavors like cheese and pepperoni. You can even involve them in choosing their toppings!
How can I freeze Mini Lunchbox Pizzas?
Once baked and cooled, place them in an airtight container or freezer bag. They’ll last for a month!
Final Thoughts
Making Mini Lunchbox Pizzas is more than just cooking; it’s creating joyful moments with your kids. The smiles on their faces as they customize their pizzas are priceless. These little delights transform a simple lunch into a fun experience, igniting creativity and culinary exploration. Plus, they’re quick and easy, making them perfect for our busy lives. I find that sharing meals like this can even spark conversations and laughter around the table. So, roll up your sleeves and get baking—your family will appreciate these tasty treasures as much as I do!
Print
Mini Lunchbox Pizzas
- Total Time: 24 minutes
- Yield: Serves 4
- Diet: Vegetarian
Description
Mini Lunchbox Pizzas are a fun and easy recipe that your kids will love. Perfect for lunchboxes or snacks!
Ingredients
- 2 cups (300 g) self-raising flour
- 1 cup (250 g) full-fat plain Greek yogurt
- ⅓ cup (90 g) tomato paste (concentrated puree)
- 1 cup (125 g) freshly shredded mozzarella
- ½ cup (80 g) pepperoni
Instructions
- Preheat the oven to 200°C (400°F) or 180°C (350°F) for fan-forced. Line a baking tray with parchment paper.
- In a large bowl, combine the self-raising flour and yogurt. Mix with a spoon until it forms large flakes, then knead with your hands until a soft dough forms (about 1–2 minutes).
- Roll out the dough on a lightly floured surface to about 1 cm (½ inch) thickness. Use a large mug or cookie cutter to cut out rounds.
- Place the dough rounds on the prepared baking tray. Spread a small amount of tomato paste over each round.
- Top each pizza with shredded mozzarella and pepperoni.
- Bake for 12–14 minutes, or until the dough is golden and the cheese has melted.
- Let the pizzas cool slightly on the tray before serving.
Notes
- Feel free to customize the toppings according to your kids’ preferences.
- These pizzas can be made ahead of time and stored in the refrigerator.
- Prep Time: 10 minutes
- Cook Time: 14 minutes
- Category: Snack
- Method: Baking
- Cuisine: Italian
Nutrition
- Serving Size: 2 pizzas
- Calories: 250
- Sugar: 2g
- Sodium: 600mg
- Fat: 12g
- Saturated Fat: 6g
- Unsaturated Fat: 4g
- Trans Fat: 0g
- Carbohydrates: 28g
- Fiber: 2g
- Protein: 10g
- Cholesterol: 30mg
Keywords: Mini Lunchbox Pizzas, easy recipe, kids food