
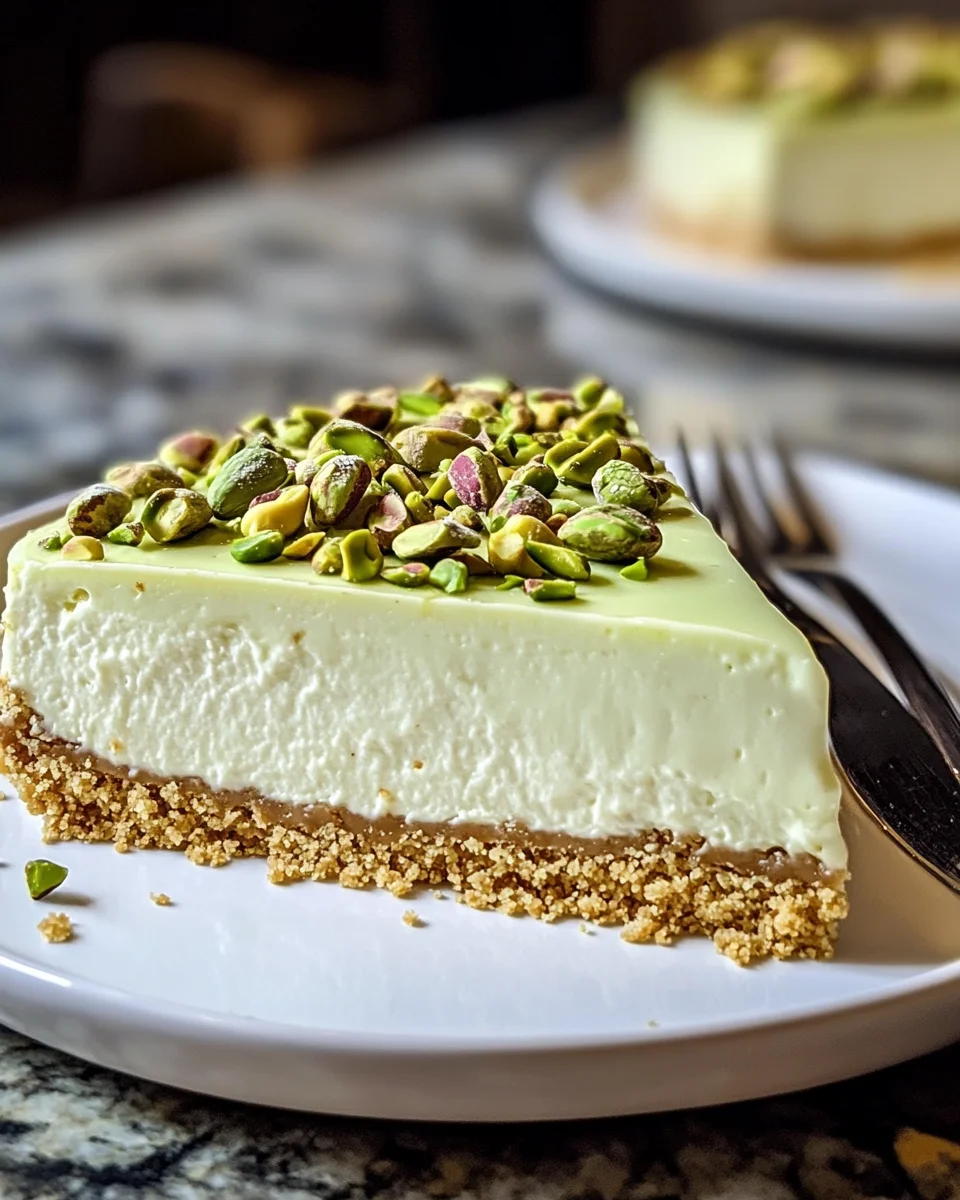
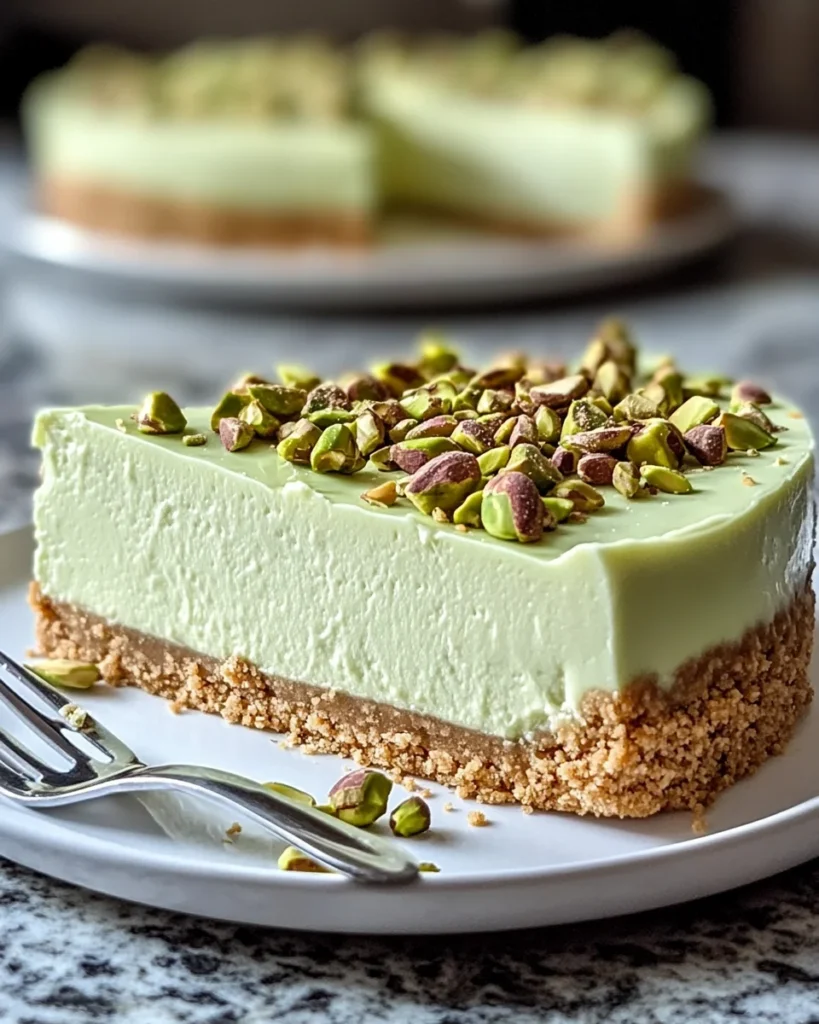
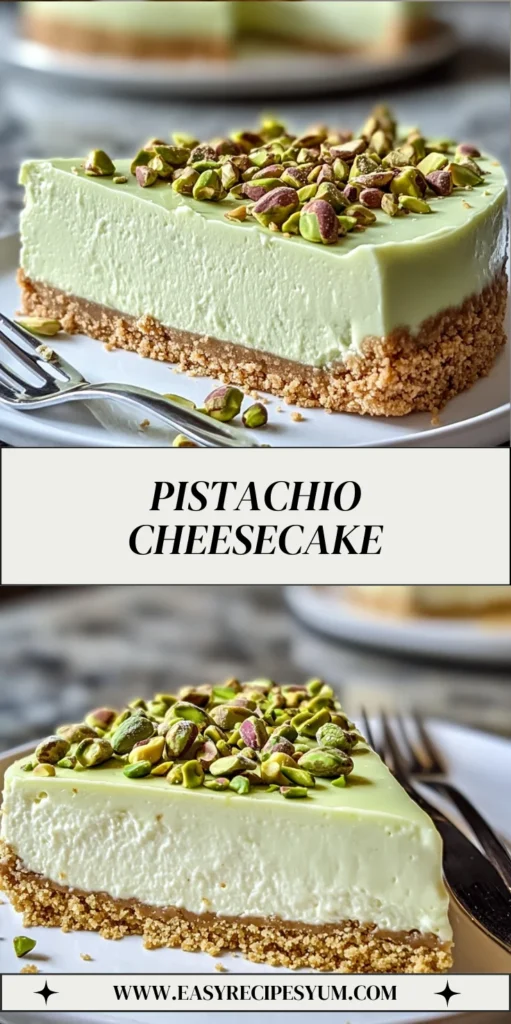
Introduction to Pistachio Cheesecake
As a passionate home cook, I know how hectic life can get, especially for busy moms and professionals. That’s why I’m excited to share my recipe for Pistachio Cheesecake! This creamy delight is not just a dessert; it’s a moment of indulgence that you can easily whip up. Imagine the rich flavors of cream cheese and pistachio paste melting in your mouth, topped with crunchy pistachios. Whether you’re celebrating a special occasion or just treating yourself after a long day, this cheesecake is sure to impress your loved ones and bring a smile to your face.
Why You’ll Love This Pistachio Cheesecake
This Pistachio Cheesecake is a game-changer for anyone short on time but big on flavor. It’s incredibly easy to make, with simple steps that even a novice can follow. The creamy texture and nutty taste create a dessert that feels luxurious without the fuss. Plus, it’s a crowd-pleaser! Your family and friends will rave about it, making you the star of any gathering.
Ingredients for Pistachio Cheesecake
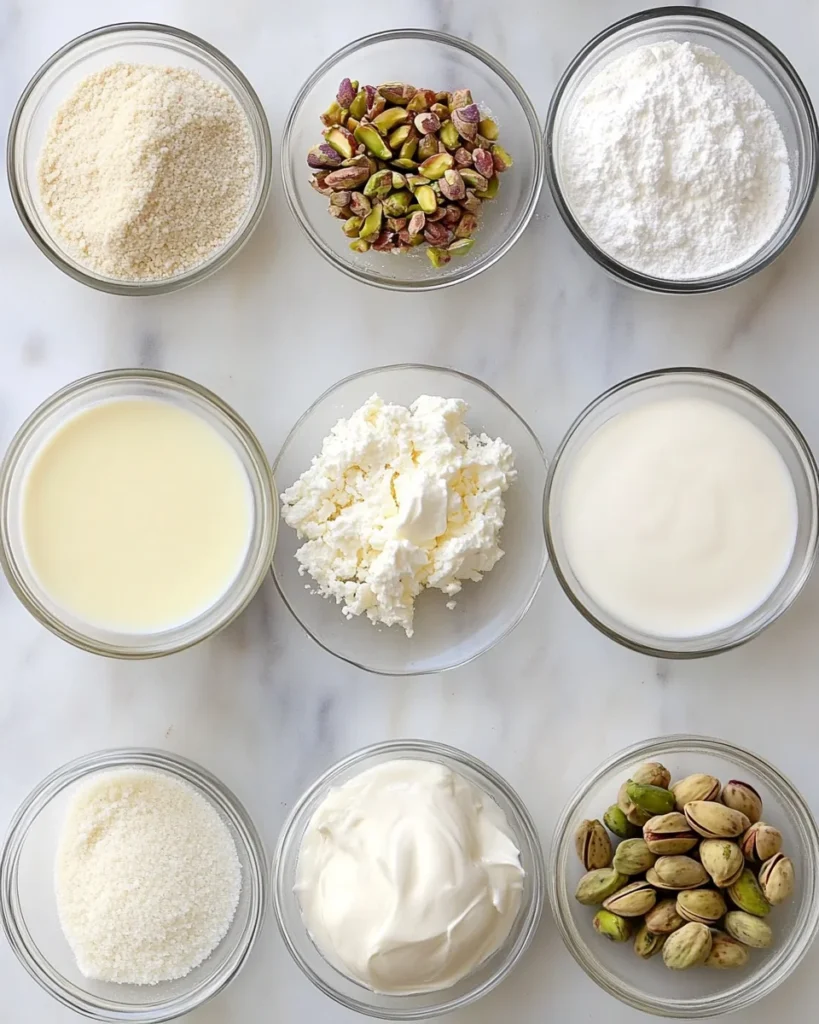
Gathering the right ingredients is the first step to creating your delicious Pistachio Cheesecake. Here’s what you’ll need:
- Graham cracker crumbs: These form the base of your cheesecake crust, providing a sweet and crunchy texture.
- Granulated sugar: A touch of sweetness is essential, both for the crust and the filling.
- Unsalted butter: This helps bind the crust together and adds richness to the flavor.
- Cream cheese: The star of the show! It gives the cheesecake its creamy texture and tangy taste.
- Sour cream: This adds a delightful creaminess and a slight tang that balances the sweetness.
- Pistachio paste: This is where the magic happens! It infuses the cheesecake with that nutty flavor we all love.
- Eggs: They help set the cheesecake, giving it structure while keeping it soft and creamy.
- Vanilla extract: A splash of vanilla enhances the overall flavor, making it even more delightful.
- Chopped pistachios: These are for topping, adding a crunchy finish and a pop of color.
For those looking to switch things up, consider using almond flour instead of graham cracker crumbs for a gluten-free crust. You can also experiment with flavored extracts, like almond or orange, to give your cheesecake a unique twist. Remember, the exact quantities for each ingredient are listed at the bottom of the article for easy printing!
How to Make Pistachio Cheesecake
Step 1: Preheat and Prepare
First things first, let’s get that oven preheating to 325°F (163°C). While it warms up, grab your 9-inch springform pan. Grease it well to ensure your cheesecake slides out easily later. To prevent any leaks, wrap the outside of the pan with aluminum foil. This little trick saves you from a messy oven! Trust me, I’ve learned the hard way. Once your oven is ready, you’ll be all set to create this creamy masterpiece.
Step 2: Make the Crust
Now, let’s whip up that delicious crust! In a mixing bowl, combine your graham cracker crumbs, 1/4 cup of sugar, and melted butter. Stir until everything is well mixed and resembles wet sand. Press this mixture firmly into the bottom of your prepared springform pan. This step is crucial for a sturdy base. Bake the crust for about 10 minutes, then let it cool completely. The aroma wafting through your kitchen will have everyone asking what’s cooking!
Step 3: Prepare the Filling
Time to make the filling! In a large bowl, beat the softened cream cheese until it’s smooth and creamy. This is where the magic begins! Gradually add in 1 cup of sugar, mixing until fluffy. Next, add the eggs one at a time, beating well after each addition. This ensures a light texture. Now, mix in the sour cream, pistachio paste, and vanilla extract. The vibrant green color of the pistachio paste is simply stunning! Make sure everything is fully combined, and you’ll have a luscious filling that’s hard to resist. Just a taste will have you dreaming of the final product!
Step 4: Assemble the Cheesecake
With your crust cooled and filling ready, it’s time to assemble! Pour the creamy filling over the cooled crust, smoothing the top with a spatula. This is where you can get creative! If you want, you can swirl in some extra pistachio paste for a marbled effect. Place the springform pan into a larger roasting pan. This will be important for the next step, so don’t skip it!
Step 5: Bake in a Water Bath
Now, let’s talk about the water bath. This technique helps prevent cracks in your cheesecake. Fill the outer roasting pan with hot water, halfway up the sides of the springform pan. Carefully place it in the oven and bake for 55-65 minutes. You want the center to be just set and slightly wobbly. This ensures a creamy texture. The water bath creates a gentle heat, making your cheesecake smooth and velvety.
Step 6: Cool and Refrigerate
Once baked, turn off the oven and crack the door open. Let the cheesecake cool in the oven for about an hour. This gradual cooling helps prevent cracks. After that, remove it from the oven and let it cool completely at room temperature. Then, refrigerate for at least 4 hours, or overnight if you can wait! The longer it chills, the better the flavors meld together. Trust me, the anticipation will be worth it!
Tips for Success
- Always use softened cream cheese for a smooth filling.
- Don’t skip the water bath; it’s key to a crack-free cheesecake.
- Let the cheesecake cool gradually to avoid sudden temperature changes.
- For best flavor, refrigerate overnight before serving.
- Top with fresh whipped cream for an extra touch of indulgence!
Equipment Needed
- 9-inch springform pan: Essential for easy removal. A regular cake pan works too, but it may be harder to serve.
- Mixing bowls: Use a large bowl for the filling and a smaller one for the crust. Any size will do!
- Electric mixer: A hand mixer or stand mixer makes beating the cream cheese a breeze.
- Spatula: Perfect for smoothing the filling and scraping down the sides of the bowl.
- Roasting pan: Needed for the water bath. A large baking dish can work as an alternative.
Variations
- Chocolate Swirl: Add a swirl of melted chocolate to the filling for a decadent twist.
- Nut-Free Option: Substitute pistachio paste with sunflower seed butter for a nut-free version.
- Fruit Topping: Top with fresh berries or a berry compote for a fruity contrast to the creamy cheesecake.
- Vegan Version: Use vegan cream cheese and a flaxseed mixture instead of eggs for a plant-based delight.
- Spiced Variation: Add a pinch of cardamom or cinnamon to the filling for a warm, aromatic flavor.
Serving Suggestions
- Pair with a dollop of fresh whipped cream for added richness.
- Serve alongside a cup of aromatic coffee or a sweet dessert wine.
- Garnish with extra chopped pistachios for a beautiful presentation.
- Consider a side of fresh fruit, like berries, for a refreshing contrast.
- For a festive touch, drizzle with chocolate or caramel sauce.
FAQs about Pistachio Cheesecake
As you embark on your Pistachio Cheesecake journey, you might have a few questions. Here are some common queries I’ve encountered, along with helpful answers to guide you.
Can I use a different nut paste?
Absolutely! While pistachio paste is the star here, you can experiment with almond or hazelnut paste for a unique flavor twist. Just keep in mind that the taste will change accordingly.
How do I know when my cheesecake is done baking?
The cheesecake is done when the edges are set, but the center is still slightly wobbly. It will continue to firm up as it cools. Trust your instincts; a little wobble is a good sign!
Can I make this cheesecake ahead of time?
Yes! In fact, making it a day in advance is ideal. This allows the flavors to meld beautifully. Just be sure to cover it well in the fridge to keep it fresh.
What should I do if my cheesecake cracks?
Don’t fret! Cracks can happen, even to the best of us. If it does crack, you can cover it with whipped cream or a fruit topping. It’ll still taste amazing!
Can I freeze leftover cheesecake?
Yes, you can freeze it! Wrap individual slices tightly in plastic wrap and then in aluminum foil. It can last up to three months in the freezer. Just thaw in the fridge before serving.
Final Thoughts
Creating this Pistachio Cheesecake is more than just baking; it’s about crafting a moment of joy. The creamy texture and nutty flavor come together to create a dessert that feels like a warm hug after a long day. Whether you’re sharing it with family or savoring a slice alone, each bite is a reminder of life’s simple pleasures. I hope this recipe brings you as much happiness as it has brought me. So, roll up your sleeves, gather your ingredients, and let the magic of this cheesecake fill your kitchen with love and laughter!
Print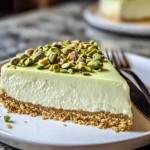
Pistachio Cheesecake: Indulge in this Creamy Delight!
- Total Time: 5 hours 20 minutes
- Yield: 8 servings 1x
- Diet: Vegetarian
Description
Indulge in this creamy pistachio cheesecake, a delightful dessert that combines the rich flavors of cream cheese and pistachio paste, topped with crunchy pistachios.
Ingredients
- 1 1/2 cups graham cracker crumbs
- 1/4 cup granulated sugar
- 6 tablespoons unsalted butter, melted
- 24 oz cream cheese, softened
- 1 cup granulated sugar
- 3 large eggs
- 1/2 cup sour cream
- 1/2 cup pistachio paste
- 1 teaspoon vanilla extract
- 1/4 cup chopped pistachios (for topping)
Instructions
- Preheat the oven to 325°F (163°C). Grease a 9-inch springform pan and wrap the outside with foil to prevent leaks.
- In a bowl, combine graham cracker crumbs, 1/4 cup sugar, and melted butter. Press into the bottom of the prepared pan to form a crust. Bake for 10 minutes and let cool.
- In a large bowl, beat cream cheese until smooth. Add 1 cup sugar and beat until fluffy.
- Add eggs one at a time, beating well after each addition.
- Mix in sour cream, pistachio paste, and vanilla extract until fully combined.
- Pour the batter over the cooled crust and smooth the top.
- Place the springform pan into a larger roasting pan and fill the outer pan with hot water halfway up the sides (water bath).
- Bake for 55-65 minutes, or until the center is just set and slightly wobbly.
- Turn off the oven, crack the door open, and let the cheesecake cool for 1 hour inside the oven.
- Remove, cool completely at room temperature, then refrigerate for at least 4 hours or overnight.
- Top with chopped pistachios before serving.
Notes
- Ensure the cream cheese is softened for easy mixing.
- For best results, refrigerate the cheesecake overnight.
- Use a water bath to prevent cracks in the cheesecake.
- Prep Time: 20 minutes
- Cook Time: 1 hour
- Category: Dessert
- Method: Baking
- Cuisine: American
Nutrition
- Serving Size: 1 slice
- Calories: 450
- Sugar: 30g
- Sodium: 300mg
- Fat: 30g
- Saturated Fat: 15g
- Unsaturated Fat: 10g
- Trans Fat: 0g
- Carbohydrates: 40g
- Fiber: 2g
- Protein: 8g
- Cholesterol: 100mg
Keywords: Pistachio Cheesecake, Creamy Dessert, Cheesecake Recipe