
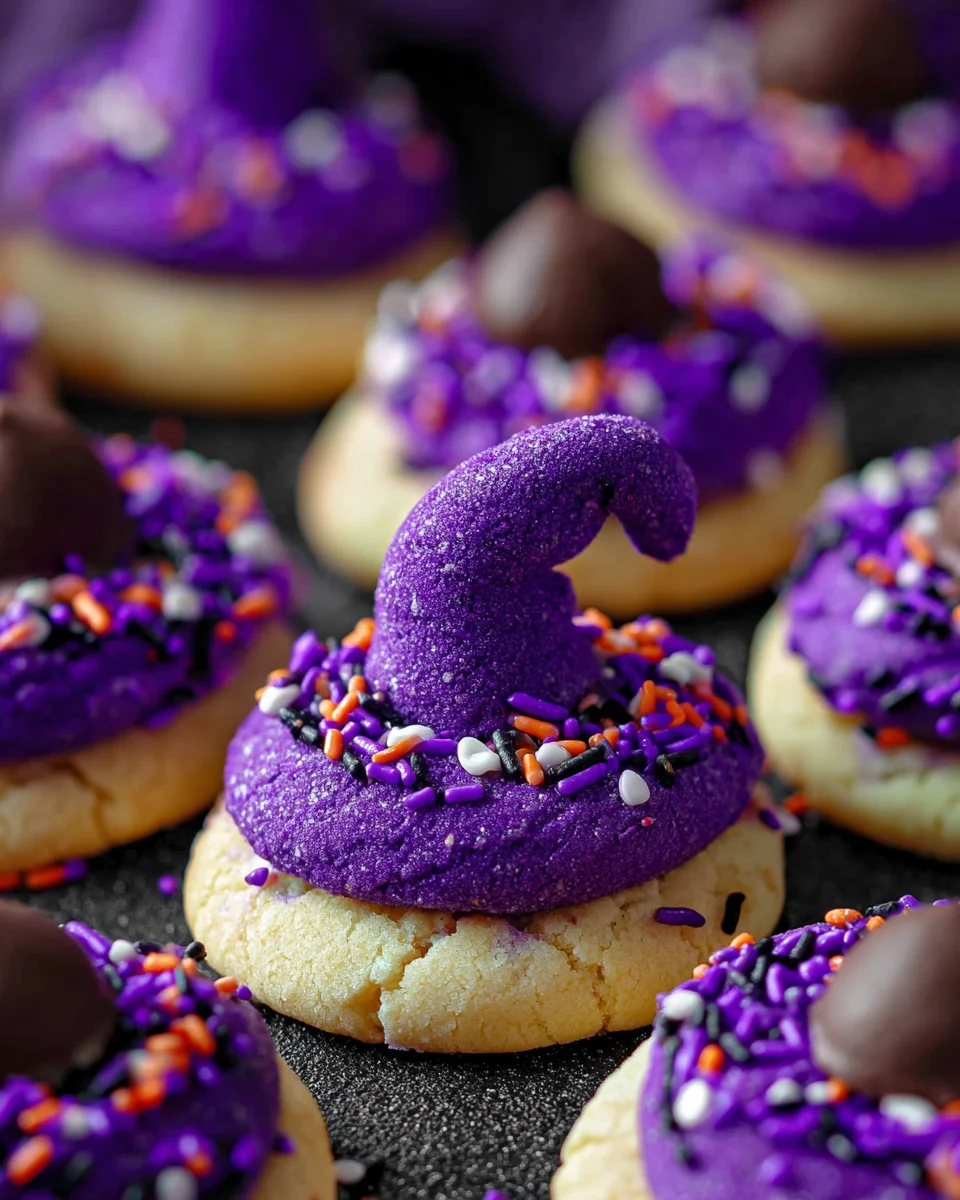
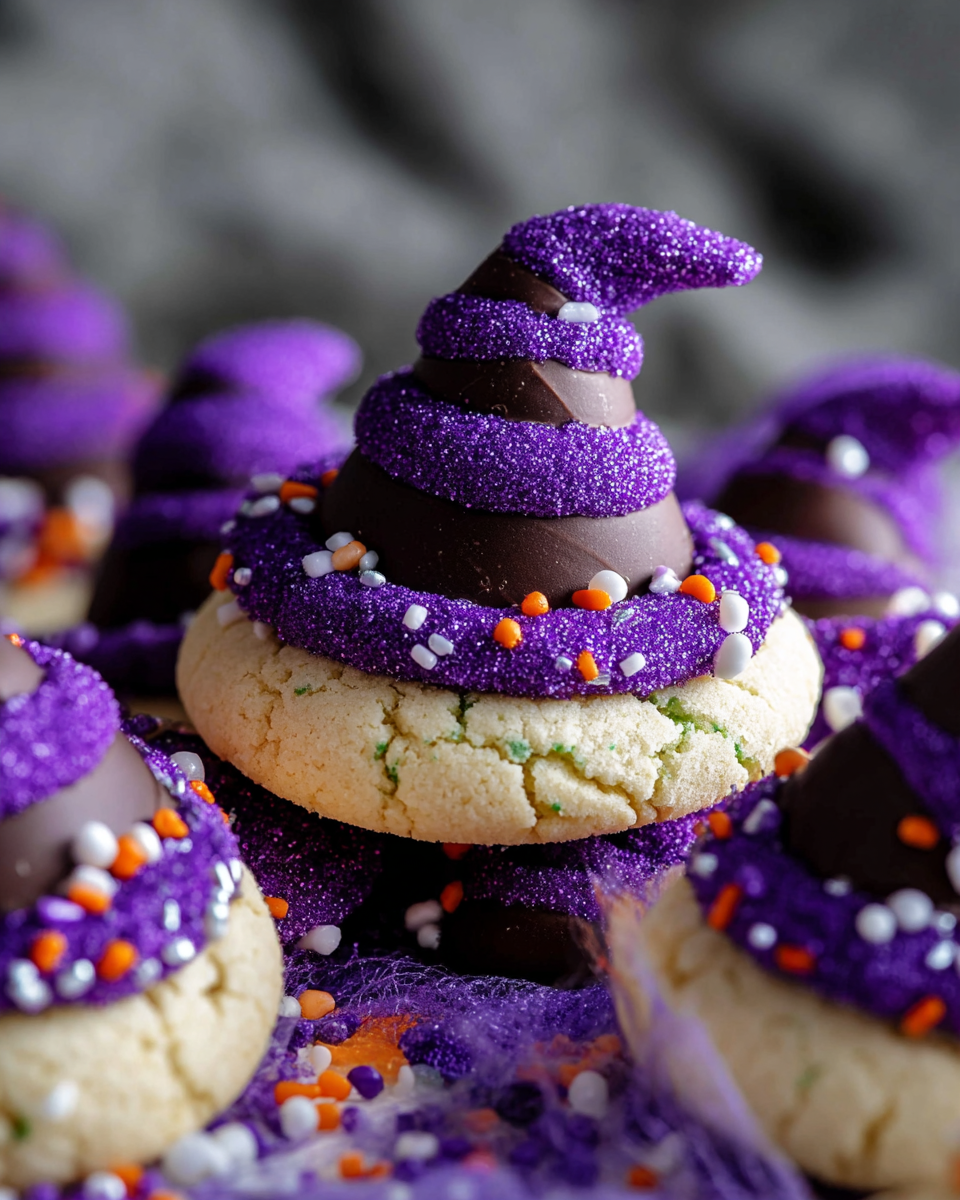
Introduction to Witch Hat Halloween Cookies
As Halloween approaches, I can’t help but get excited about the delightful treats that fill our homes with warmth and nostalgia. One of my favorite go-to recipes is the Witch Hat Halloween Cookies. These adorable, festive cookies are not just a feast for the eyes; they’re a quick solution for busy days when time is tight, yet you want to impress your loved ones. With the rich flavor of peanut butter and a whimsical chocolate topping, these cookies are bound to enchant any crowd. So, let’s dive into a little spooky baking magic together!
Why You’ll Love This Witch Hat Halloween Cookies
These Witch Hat Halloween Cookies are not only adorable but super easy to whip up, even on the busiest of days. With simple ingredients and quick baking times, they come together in no time. Plus, the rich peanut butter flavor paired with the sweet chocolate hugs creates a taste that’s simply irresistible. They’re perfect for kids and adults alike, making your Halloween celebrations extra special without all the fuss!
Ingredients for Witch Hat Halloween Cookies
Let’s gather our magical ingredients for these Witch Hat Halloween Cookies! Each one plays a unique role in creating a treat that’s both festive and delicious. Here’s what you’ll need:
- All-purpose flour: This is the backbone of our cookies, giving them structure and stability.
- Cornstarch: Helps to create a tender, soft cookie by reducing gluten formation.
- Baking powder: This leavening agent adds fluffiness, ensuring our cookies rise perfectly.
- Baking soda: Works alongside baking powder to create a light texture.
- Salt: Just a pinch enhances the flavors, balancing the sweetness.
- Unsalted butter: Adds richness and a delightful creamy texture.
- Granulated sugar: The key to sweetness; it helps in achieving that delightful cookie crunch.
- Egg: Acts as a binder to hold everything together while adding moisture.
- Vanilla extract: Infuses a warm, comforting flavor that complements the peanut butter beautifully.
- Creamy peanut butter: This is where the magic happens—creamy and nutty, perfectly pairing with the chocolate topping.
- Purple gel food coloring: Essential for creating those perfectly spooky witch hats!
- Hugs or chocolate kisses: These are the adorable chocolate “hats” that crown our cookies.
- Halloween sprinkles or purple sanding sugar: For that extra festive flair, sprinkle these on top for a pop of color!
You can find all the exact measurements for these ingredients at the bottom of the article, ready for printing to help you in your baking adventure.
How to Make Witch Hat Halloween Cookies
Let’s whip up some magic in the kitchen with these Witch Hat Halloween Cookies! Follow these simple steps, and you’ll have a batch of festive treats to impress your family and friends.
Step 1: Prepare the Dry Ingredients
Start by whisking together the flour, baking powder, baking soda, cornstarch, and salt in a medium bowl. This step is crucial as it evenly distributes the leaveners and ensures your cookies rise perfectly. The combination of these ingredients sets the stage for deliciousness!
Step 2: Cream the Butter and Sugar
In your mixer, cream the softened butter with granulated sugar for about 2 minutes until it’s fluffy and light. This process creates tiny air pockets in the butter, leading to that delightful cookie texture we all love. Remember, mix well, but avoid adding air into the mixture—just enough to get creamy!
Step 3: Combine Wet Ingredients
Next, add the egg and vanilla extract to the butter mixture. Mix until just combined. Then, introduce the creamy peanut butter to your mix, which adds that magical, nutty richness. You’ll want this well incorporated for flavor in every bite!
Step 4: Mix Dry Ingredients with Wet Ingredients
Now it’s time to unite the dry and wet ingredients. Gently add the dry mix to the wet and stir on low until combined. Be careful not to over-mix—this helps maintain a tender cookie. You want it just blended, not a homogeneous dough.
Step 5: Add Color to the Dough
Here comes the fun part! Add purple gel food coloring to your dough bit by bit, mixing until you reach your desired spooky hue. Don’t be shy; adjust it to fit your Halloween theme! This vibrant color will turn these cookies into a real treat for the eyes.
Step 6: Chill the Dough
Cover the dough and chill it in the refrigerator for at least 2 hours. Chilling is essential; it helps the dough hold its shape while baking and guarantees your cookies come out perfectly round and delightful. If you’re in a hurry, even a quick 15-minute chill will help!
Step 7: Bake the Cookies
When you’re ready, preheat your oven to 350°F (175°C) and line your baking sheets with parchment paper. Scoop tablespoon-sized balls of dough, roll them in Halloween sprinkles or purple sanding sugar, and place them 2 inches apart on the baking sheets. Bake for 8 to 10 minutes. Look for puffy, slightly cracked cookies. Remember, we want them soft, so no browning!
Step 8: Add the Chocolate Topping
Once the cookies are out of the oven, let them cool on the sheet for 5 minutes. Then, gently press a chocolate Hug or kiss into the center of each cookie. This creates the classic witch hat look! Cool the cookies in the freezer for about 10 minutes to avoid melting the chocolate before transferring them to a wire rack.
Tips for Success
- Chill the dough thoroughly to maintain shape and achieve that perfect bite.
- Keep an eye on your baking time; underbaked cookies are soft and delicious!
- Experiment with different colored sprinkles for a fun twist to suit your Halloween party.
- Use a silicone baking mat to prevent sticking and ensure even baking.
- Let the cookies cool completely before storing for the best texture.
Equipment Needed
- Mixing bowls: A medium bowl for dry ingredients and a larger one for mixing wet ingredients.
- Hand mixer or stand mixer: A hand whisk works too, but mixing takes longer.
- Baking sheets: Line them with parchment paper or silicone mats for easy cleanup.
- Wire cooling rack: Essential for cooling cookies evenly.
Variations
- For a chocolatey twist, replace some of the all-purpose flour with cocoa powder.
- Use crunchy peanut butter instead of creamy for a delightful texture contrast.
- Try adding a dash of cinnamon or nutmeg to the dough for a warm, cozy flavor.
- For a nut-free version, substitute peanut butter with sunflower seed butter.
- Make these gluten-free by using a 1:1 gluten-free flour blend.
Serving Suggestions
- Pair these Witch Hat Halloween Cookies with a cup of warm apple cider for a seasonal delight.
- Present cookies on a spooky platter adorned with faux cobwebs for a festive touch.
- Serve alongside Halloween-themed treats, like pumpkin spice cupcakes or ghost-shaped marshmallows.
- For added fun, include a selection of colorful Halloween candies for guests to enjoy!
FAQs about Witch Hat Halloween Cookies
As we prepare to bake some Witch Hat Halloween Cookies, you might have a few questions in mind. I’m here to help clear the fog, so let’s answer some common queries about this delicious, festive treat.
Can I make these Witch Hat Halloween Cookies ahead of time?
Absolutely! You can make the cookie dough in advance and chill it overnight. Just remember to let the dough sit at room temperature for about 15 minutes before scooping and baking. This little trick keeps them perfect!
What if I don’t have purple gel food coloring?
No worries! You can use any food coloring you have on hand. Orange, green, or even black could add a fun twist to your Halloween theme. Just adjust the color to your liking and let your creativity shine!
Are there any tips to keep the cookies soft?
To keep your cookies soft, make sure not to overbake them. They should slightly puff and show tiny cracks without browning. Additionally, allowing them to cool slightly on the baking sheet before transferring to a wire rack helps them retain moisture.
Can I use different types of chocolate?
Of course! While the original recipe calls for chocolate Hugs or kisses, feel free to experiment with white chocolate or even mint chocolate for a festive flair. Just be mindful of melting times to keep those adorable hats intact!
Are Witch Hat Halloween Cookies kid-friendly?
Absolutely! With no tricky techniques or hazardous ingredients, these cookies are perfect for a fun baking activity with the kids. Plus, they’ll love decorating and eating these delightful spooky treats!
Final Thoughts
As a home cook, there’s a certain joy in creating festive treats like Witch Hat Halloween Cookies. The blend of creamy peanut butter and chocolate hugs makes for a delectable combination that delights both kids and adults. Watching family and friends gather around these spooky sweets adds a sprinkle of warmth to our Halloween celebrations. They’re not just cookies; they’re cherished moments filled with laughter and creativity in the kitchen. So, as you whip up a batch, know you’re crafting a sweet tradition that will be remembered and enjoyed year after year!
Print
Witch Hat Halloween Cookies
- Total Time: 2 hours 30 minutes
- Yield: 30 cookies 1x
- Diet: Vegetarian
Description
Witch Hat Halloween Cookies are festive treats made with peanut butter and decorated with chocolate hugs or kisses, perfect for Halloween parties.
Ingredients
- 1 ½ cups all purpose flour
- 2 teaspoons cornstarch
- ¼ teaspoon baking powder
- ½ teaspoon baking soda
- ¼ teaspoon salt
- ½ cup unsalted butter, softened
- 1 cup granulated sugar
- 1 egg, room temperature
- 1 teaspoon vanilla extract
- ¾ cup creamy peanut butter
- Purple gel food coloring
- 30 Hugs or chocolate kisses, carefully unwrapped
- Halloween sprinkles or purple sanding sugar
Instructions
- In a medium bowl, whisk together the flour, baking powder, baking soda, cornstarch, and salt. Set aside.
- Using a hand mixer or stand mixer, cream the butter and sugar together until creamy, about 2 minutes. Scrape down the sides of the bowl as needed.
- Add the egg and vanilla extract and mix until combined.
- Add the peanut butter to the mixture and mix until combined, scraping down the sides of the bowl as needed.
- Add the dry ingredients to the wet ingredients and mix on low just until combined.
- Add purple gel food coloring to the dough until you reach the desired color, thoroughly incorporating it before adding more.
- Cover and chill the dough for 2 hours or overnight. If chilling overnight, let the dough sit at room temperature for 15 minutes before scooping.
- Preheat the oven to 350°F (175°C). Line two large baking sheets with silicone baking mats or parchment paper.
- Place Halloween sprinkles or purple sanding sugar in a small bowl.
- Scoop about 1 tablespoon of cookie dough, roll into a ball, and then roll in the sugar. Place on the prepared baking sheets about 2 inches apart. Repeat with the remaining dough.
- Bake for 8 to 10 minutes, until the cookies puff up and show small cracks (do not brown). Allow to cool for 5 minutes on the baking sheet.
- Gently press a Hug or kiss into the center of each cookie.
- Place the cookie sheet in the freezer for 10 minutes to prevent the chocolate from melting. Transfer cookies to a wire cooling rack and repeat with the remaining dough.
Notes
- Chilling the dough helps to maintain the shape of the cookies while baking.
- Make sure the cookies do not brown for a soft texture.
- Feel free to use different colored sprinkles for a fun twist.
- Prep Time: 20 minutes
- Cook Time: 10 minutes
- Category: Dessert
- Method: Baking
- Cuisine: American
Nutrition
- Serving Size: 1 cookie
- Calories: 150
- Sugar: 10g
- Sodium: 100mg
- Fat: 7g
- Saturated Fat: 4g
- Unsaturated Fat: 2g
- Trans Fat: 0g
- Carbohydrates: 20g
- Fiber: 1g
- Protein: 3g
- Cholesterol: 15mg
Keywords: Witch Hat Halloween Cookies, Halloween, cookies, peanut butter cookies